Regular visitors to this blog will know that I’m not a huge fan of fruit cake but feel there’s something missing at Christmas if I don’t have one. I also like a challenge and Waitrose, offered me the ingredients to take part in their ‘Stir-Up Sunday campaign’. It always falls on the last Sunday before Advent, Sunday 22nd November, and it’s traditionally the day everyone in the family takes a turn at stirring the Christmas Pudding, at the same time making a wish.
My brief was to create my very own Christmas pudding or cake recipe with a twist, explaining my inspiration and why the flavours work well together.
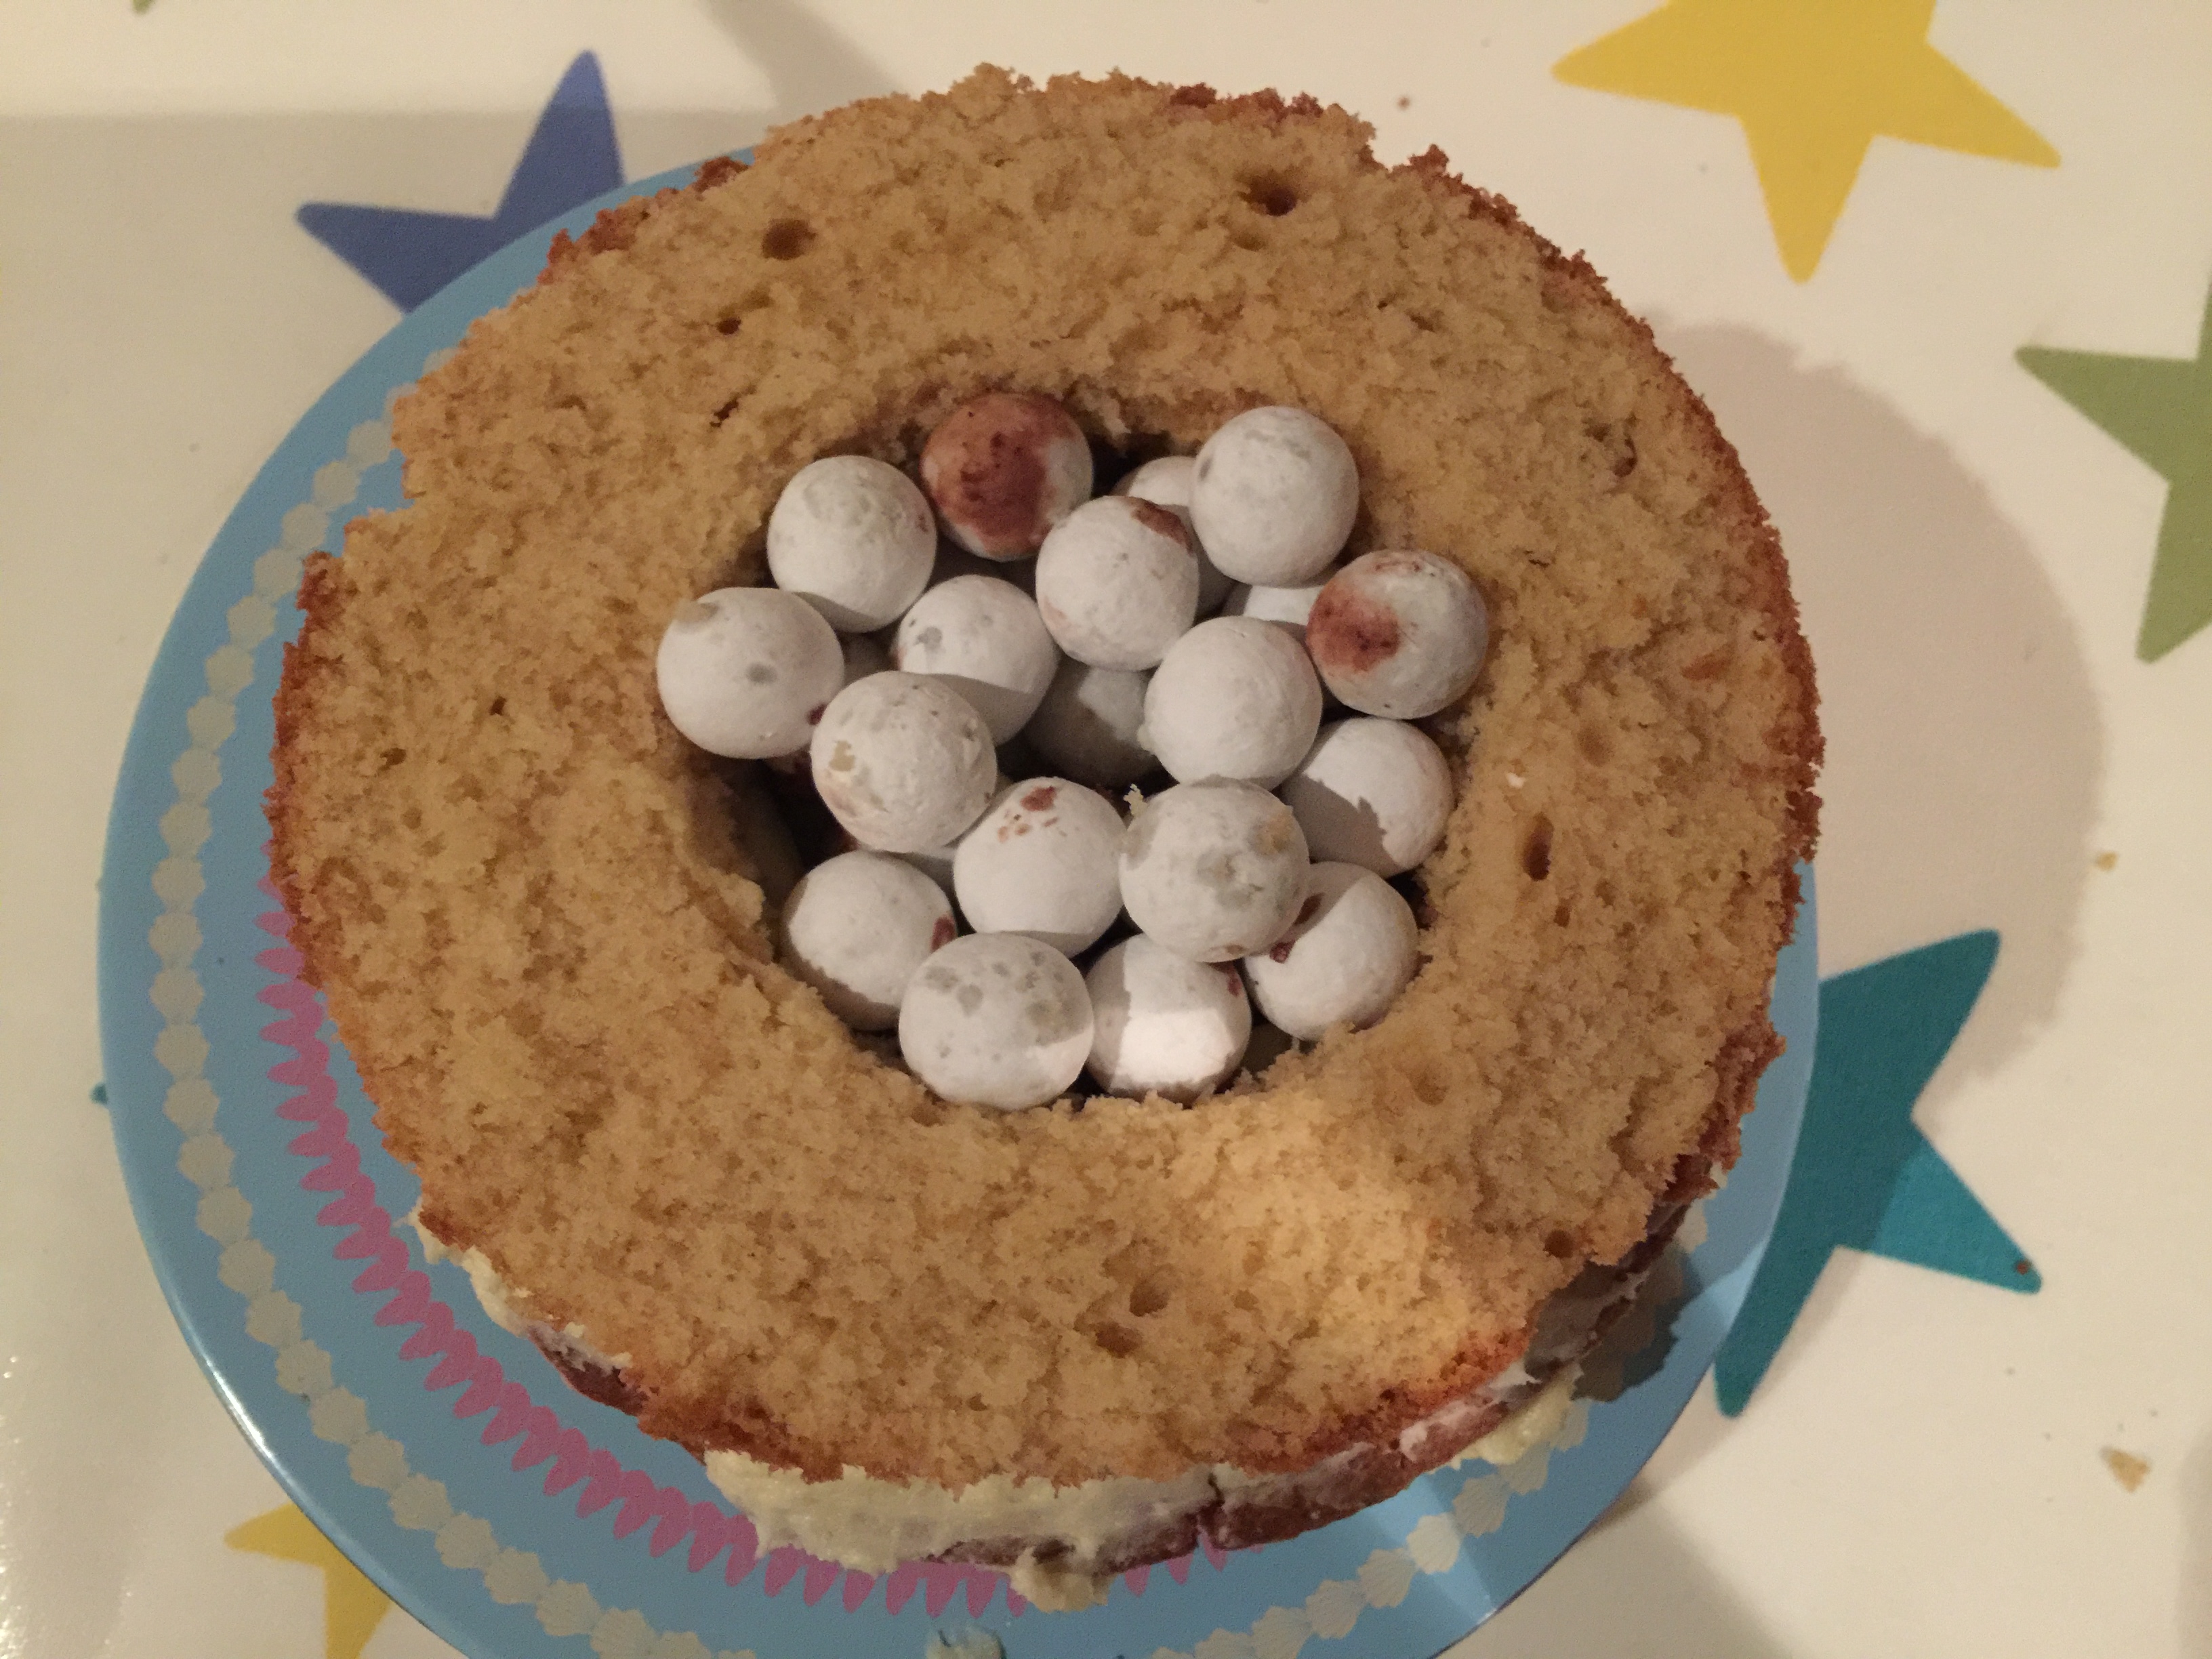
My contribution is a cake made with 6 sponges, sandwiched together with a delicious vanilla-laden buttercream, hidden beneath a layer of fondant icing. As you cut into the cake, small chocolate snowballs roll out – the twist. All the other components that make up the cake are from fondant icing. If you wanted to add a touch of Christmas to the mix, you could add sweet mincemeat, where there would usually be jam in addition to the buttercream layers. Otherwise this works just as well with raspberry or strawberry jam or indulgent caramel from a jar.
My inspiration was simple. Who doesn’t love a sad snowman, a decent Victoria Sponge cake and a surprise? How did it taste? My office ‘guinea pigs’ thought it was fabulous, luxurious and great fun. Here’s how I did it.

Ingredients
2.5kg white fondant icing
Brown food colouring (for twig arms)
Black food colouring (for buttons and eyes)
Orange food colouring (for carrot nose)
Red food colouring (for scarf)
4 packets of Cadbury snow bites (3 plus one for munching during production) although you can use whatever you like.
Tools
Small paintbrush
Cocktail sticks
Scone cutter
Large piece of wood or suitably large board (24″ x 34″) material to cover it – I used eight pieces of A3 paper but you could use wrapping paper or foil.
Cake turntable
Spatula
Rolling pin
2 cake tins with loose bottoms 6″
Small cake board – 7″ at the most – I didn’t use one but it might be a good idea if you wish to transport the cake.
For the cakes – each batch makes 2 cakes
It’s best to make these up separately because sitting cake mix affects the bake. The bracketed ingredients are for 6 cakes.
150g Unsalted butter (450g unsalted butter
150g Caster sugar (450g caster sugar)
3 Eggs, medium (9 eggs)
1 tsp Vanilla extract (3 tsp I use Neilsen-Massey – it’s the best)
200g Self-raising flour (600g self-raising flour)
1 tsp Baking Powder (3 tsp Baking Powder)
Method
Begin by covering your board and creating your snowman accessories. Pinch off some fondant and roll it into the shapes before you colour it. You don’t want excess orange fondant, or any other colour really, because it doesn’t keep too well and the ingredients are enough for the entire cake. There’s nothing worse than running to the shops halfway through a bake. Use a cocktail stick to add your colour, little and often, until you have the right shade.

To give you an idea I used the tube of this black colouring to colour a fistful of fondant. I made two ball eyes and the buttons, with added detail.


The carrot was next and I used a cocktail stick to add a few carrot-like grooves.

I rolled the fondant into a long rectangle, for the scarf and snipped with scissors at each end, to make a few tassels, I also added a few woolly holes. I used a paintbrush to add the red colour directly onto the fondant to form stripes.


The twig arms are a long fondant sausage. I snipped three sections on one end to create ‘fingers’ and two on the other. The downturned mouth was also shaped to look like a twig.
I split a packet of 1kg fondant icing and rolled out into balls. I flattened them and rolled them into two misshapen puddles. I added these to the paper-covered board. Then I carefully added the scarf, the buttons and twig arms. Once you have placed them don’t move them, the fondant will crack as it hardens and all your hard work will ruin.
Next, the cake.
Grease your tins with butter and flour. Combine the sugar and butter in a bowl and beat in your eggs. If they curdle, slowly fold-in a little flour. Add the sieved flour and baking powder and gently fold. You’re trying to add air to the mix here so don’t, whatever you do, beat. Divide the mixture between the two tins and bake in the middle of the oven for 20 minutes or until a skewer comes out clean. Wait for your pans to cool, remove the cake. Wash the pans and repeat so you have 6 cakes in total.
When all the cakes are cool and ready to handle, take two cakes and cut out a hole in each with the scone cutter.

Make one of the sponges smaller than the others by cutting around a smaller plate – this will be the top sponge.
If you want to put your cake on a small cake board then buy one just a little bigger than the pans. A revolving cake stand will really help and if you’re using a cake board put that down on the turntable first. I didn’t bother with the cake board, I moved my cake using a large fish slice. Just slowly and with great care.
Take two sponges and sandwich together with the buttercream.
Sandwich the cut sponges together and add them to the stack, put your snowballs or other sweets into the hole you’ve created.
Buttercream together the remaining sponges.
Before you add the buttercream, measure across the top and side of the cake using a piece of string – giving yourself a couple of centimetres extra, for safety. Measure this on a ruler and you’ll have your dimensions for when you roll the fondant.
Now crumb the entire cake stack. Basically this means covering the cake in buttercream which helps the fondant to stick and help to mould it to shape. Make sure your edges are smooth and remove any excess. Place in the fridge for 30 minutes.
Take the fondant you have left and roll into a ball. Make sure you have an entirely clear work surface, then dust it with icing sugar or cornflour. Knead your fondant and roll out. Use your string measurements to make sure you have your fondant rolled to the right size.
Remove your cake from the fridge.
Lift your rolled fondant using the rolling-pin and drape it over the top of the cake. Smooth the fondant using your hands, pushing out air bubbles and creases. Start at the top and work your way down the sides. Cut away the excess, not too close to the cake, tucking ends underneath.
Take four cocktail sticks and add one each into the eyes pushing in halfway and two into the end of the carrot nose, doing the same. Add to the iced head. Do the same with two either end of the mouth.
Move your cake to the body. Cut and watch the gathered crowd gasp at your handiwork.

This cake is probably best eaten within 3 or 4 days of making to enjoy it at it’s best – mine didn’t last that long.
For inspiration Waitrose have put together some puddings with a twist, some old favourites and some new, take a look at let me know of your favourite Christmas recipes with a twist.
